
10 Essential Tips for Perfect Grout Cleaning at Home
- Jun 18, 2025
- 6 min read
Grout is one of those often-overlooked areas in our homes that can become a source of frustration when it comes to cleaning. Over time, it can accumulate dirt and stains, turning from a pristine white to a gloomy gray. But don’t fret! With the right techniques and a bit of elbow grease, you can make your grout look brand new. In this guide, we’ll explore ten essential tips to help you achieve perfect grout cleaning at home. Let’s dive in!
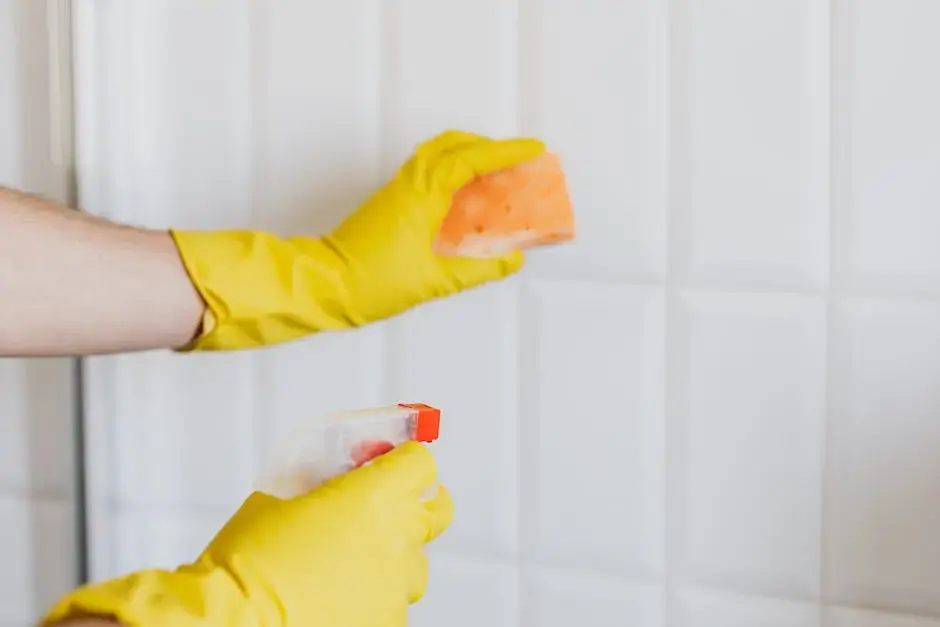
1. Start with the Right Tools
Before jumping into cleaning, gather the essential tools like a stiff brush, a bucket, and appropriate cleaning solutions to ensure effective grout cleaning. Having the right tools at your fingertips makes the process smoother and more enjoyable. For instance, a stiff-bristled brush will help you to effectively scrub away dirt and mildew that has built up in the grout lines. And don’t forget a pair of rubber gloves to protect your hands from harsh chemicals! You want to feel comfortable while you clean, so ensure your tools are in good shape and ready to tackle any mess.
Additionally, having a spray bottle handy can make your job easier. With it, you can easily apply your cleaning solution directly onto the stubborn spots, targeting problem areas without over-saturating your surfaces. Preparation is key, and it sets the foundation for a successful grout cleaning session. So, take a moment to gather your implements — you’ll thank yourself later when the cleanup goes as smoothly as possible!
2. Choose the Best Cleaning Solution
Understanding the options available is crucial for successful grout cleaning. You can opt for homemade solutions like vinegar and baking soda, which are not only inexpensive but also eco-friendly alternatives to harsh commercial cleaners. These combinations work wonders, breaking down grime and stains without damaging your grout. However, if you're dealing with particularly tough spots or an extensive project, consider commercial cleaners formulated specifically for grout — they can save you time and effort.
It’s important to read the labels and ingredients to avoid any that might cause discoloration or other unwanted effects. Finding the right cleaning solution can often feel overwhelming, but trusting your instincts about what has worked for you in the past can make this decision easier. The ultimate goal is a solution that effectively cleans without compromising your grout’s integrity.
3. Test in an Inconspicuous Area
As a precaution, always test your cleaning solution in a less visible spot before diving in. This step is crucial to ensure that it won’t damage your grout or tiles before proceeding with the entire area. Despite your best intentions, not every product reacts the same way on different surfaces. A little test can go a long way in preserving the look of your flooring. It might seem tedious, but trust me, the peace of mind you gain is worth the effort.
Look for grouting that is least visible. This could be behind furniture or in the corners of a tiled bathroom. Once you’ve tested, give it some time to sit before rinsing, as the solution needs time to work. After rinsing, inspect the grout closely — if all is well, you’re free to tackle the larger areas ahead with confidence!
4. Apply Cleaner Generously
When applying your chosen cleaner, remember that less is not necessarily more when it comes to grout cleaning. Be sure to cover the grout lines thoroughly, allowing the solution to penetrate and loosen the built-up grime. Think of it like giving your grout a nice bubble bath; it deserves that attention! Use a spray bottle or sponge to apply the cleaner directly onto the grout, soaking the lines well to lift dirt and stains effectively.
Let the cleaner sit for at least 10-15 minutes before scrubbing — this waiting period is essential for it to work its magic. If the grout is particularly dirty, consider applying a second coat of cleaner before the first one has dried to maximize effectiveness. Remember, patience pays off when it comes to cleaning, so don’t rush this step. Enjoy a cup of tea or listen to your favorite tunes while waiting; you’re setting the stage for a sparkling clean surface!
5. Use the Right Scrubbing Technique
Utilize a stiff brush to scrub the grout lines effectively; however, technique matters too. A circular motion can yield better results while minimizing personal effort and avoiding damage to your tiles. Some people mistakenly scrub back and forth, which can weaken the grout over time. Instead, focus on those circular strokes, applying steady pressure. It’s not just about how hard you scrub but also how well you scrub.
Don’t hesitate to get into those crevices — a toothbrush can be a wonderful tool for those tricky spots! The key here is to be thorough but gentle; the aim is to restore, not to destroy. If any areas require a little more attention, feel free to go over them again after rinsing. You may discover that a second pass makes a world of difference, revealing the true beauty of those grout lines that were once hidden under dirt!
6. Rinse Thoroughly
After scrubbing, rinse the area with clean water to remove any residual cleaning solution and dirt. This step is crucial! Residue left behind can attract dirt and negate your hard work. Using a mop or a clean sponge dipped in water works wonders; just remember to rinse your mop or sponge frequently to prevent spreading grime back over your tiles. It can feel satisfying to see that dirty water transform into a clear rinse, revealing how effective your effort was.
Consider doing a final rinse with a vinegar solution, as vinegar can help eliminate any lingering residues while leaving your tiles with a lovely sheen. In any case, ensure that you thoroughly dry the swabbed area afterward. This prevents mold or mildew from establishing a home in any damp surfaces, especially in areas prone to moisture, such as the bathroom or kitchen.
7. Consider Grout Sealing
After deep cleaning your grout, it's a wise idea to consider applying a sealer. This additional step can help protect your grout from future stains and dirt buildup, prolonging its pristine appearance. A good sealer will act as a barrier against spills and debris, making your future cleaning efforts less daunting. You’ll eventually save time and energy, and who doesn’t want that?
When selecting a grout sealer, make sure to choose one that aligns with the sheen of your existing tiles, whether they are glossy or matte. Applying the sealer is straightforward, but follow instructions carefully — typically, you’ll apply it with a brush or sponge, ensuring even coverage over all grout lines. Once sealed, your grout will not only repel stains but also enhance the overall look of your tiled surfaces, making them glow like new!
8. Maintain Regular Cleaning Schedule
One of the best keys to maintaining beautiful grout is incorporating grout cleaning into your regular cleaning routine. Instead of allowing dirt to accumulate over time, a quick once-over every few weeks can manage stains before they become significant issues. Even a simple wipe-down with a damp cloth or sponge can help keep your grout looking fresh.
Consider establishing a specific day for this task in conjunction with other cleaning chore. This way, it becomes a habit, and you won’t neglect these often-overlooked areas. Remember, prevention is always more manageable than a major cleanup! Plus, with a consistent schedule, you can spend less time scrubbing and more time enjoying your clean home.
9. Utilize Professional Services When Needed
For persistent stains or large areas, hiring professional grout cleaning services can be a game-changer. These professionals have specialized equipment and solutions designed to tackle even the toughest cleaning jobs, saving you from needless stress. While it might be an added expense, think of it as an investment in maintaining your home’s beauty and hygiene.
Before deciding on a service, do your research. Read reviews or get recommendations from friends. A thorough clean provided by specialists can often restore your grout to a condition you thought was long gone. After their visit, the maintenance you perform will be much easier, as most professionals provide helpful tips on how to keep your grout in top shape.
10. Protect Your Grout from Future Stains
Finally, use mats, area rugs, or even preventative products to shield your grout from spills and dirt. This step cannot be overemphasized! Protective coverings can significantly reduce the amount of debris that comes in contact with your grout, acting as a first line of defense against stains.
Also, encourage a no-shoes policy in certain areas of your home to minimize tracked-in dirt. Small changes can create a significant impact over time. If accidents happen, having a direct plan in place for quick reaction will help mitigate the mess before it can settle in. By being proactive, you’ll preserve the cleanliness and beauty of your grout for many years to come.


Comments